Showing posts with label red. Show all posts

Friday, February 03, 2017

Card Design: Pattie's Creations Challenge #131...Lots of RED

http://pattiescreationschallenge.blogspot.ca

Hey folks! I'm here today to announce the next challenge over at Pattie's Creations Design Challenge. Before I start, I just wanted to say a big HAPPY ANNIVERSARY to ME--This month marks my THIRD year with Pattie's Creations!!! I cannot believe how quickly the time has passed. Since I started back in February of 2014, there have been lots of team changes--in fact, I'm the only team member still around from three years ago, all the designers currently on the team have come on since that time. Though, there are two people that have been constant during my time and that is Pattie herself, the owner and designer of the wonderful images I get to use each month, and her sister Sandi, who is our Team Leader. Thanks so much to these two lovely ladies for all their hard work and also for believing in me and keeping me around! I look forward to my future as a designer on this team.

Right now, it is time to get back to the details of this challenge. This time around for Challenge #131, the theme is Lots of RED. You can go the traditional route with hearts and/or flowers since Valentine's Day is fast approaching; or, you can take a non traditional road like I did and make something different. As long as you use lots of RED in your project, the form it takes is up to you!

Here is my card, I hope that I haven't forgotten any important details:

General Info:
  • If you have been with me for a while, you know my fondness for puns! I thought this would make a berry sweet card for my momma's upcoming birthday.
  • This card has been created 100% digitally and then layered in a Mock Up (courtesy of Frisk Shop). I will print it out and assemble it a later date.

FRONT

Digital Image Details:
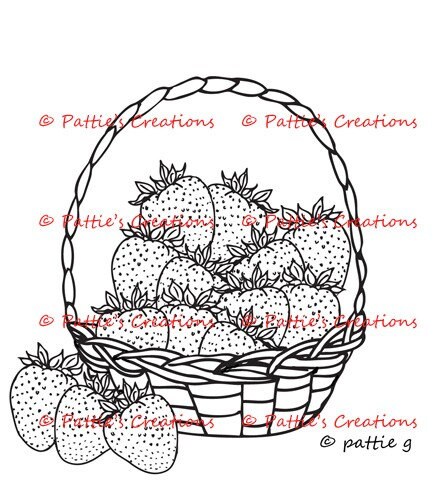
  • Strawberries In Basket: I love this beautiful basket of strawberries. You can find it in Pattie's Etsy shop by clicking on the image name or watermark linked below.
  • This image has been coloured digitally.
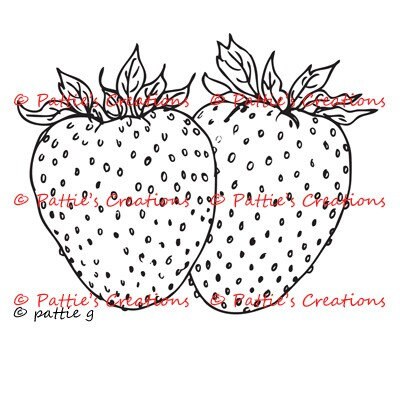
  • Two Strawberries: This was the perfect image to add to the sentiment. It can also be found in Pattie's Etsy store.
 

Digital Sentiment Details:
  • This pun sentiment was created by Paulette from Create with TLC. It is available in the Sweet Sentiments Birthday set. For great freebies and inspiration be sure to click HERE to go to Paulette's blog and for awesome sets for purchase, click HERE to go to the home page of the store.


Digital Embellishments:
  • The buttons were created using a template and the button strings were an existing element that I recoloured to suit the purpose of this card. Both of these items were originally designed by Sheila Reid, Pixel Scrapper.

INSIDE

Digital Image Details:
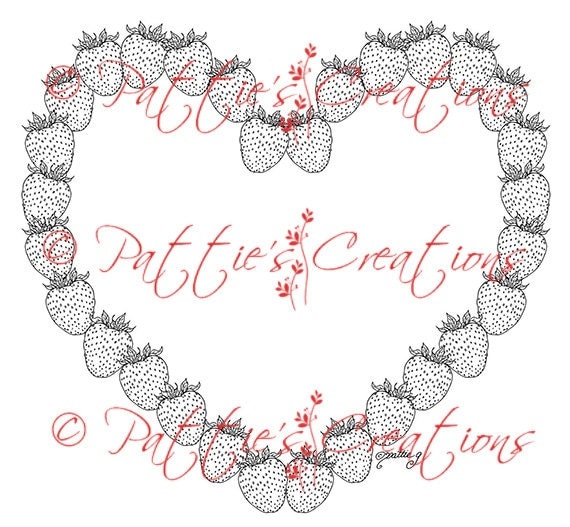
  • Strawberry Love Heart: How could I resist adding this fabulous strawberry heart frame to the inside of my card?! This image can also be found in Pattie's Etsy store. 
  • I decided to just colour the outline instead of all the berries to give it a sort of outline silhouette look.
 

Digital Sentiment Details:
  • The sentiment used on the inside of my card was also created by Paulette from Create with TLC.


OVERALL
Digital Paper Products:
  • I have used two papers from the Tooty Fruity kit, along with a paper from the Satin Fabrics kit. All these papers are from Imagine That! Digistamp. Click on the wms below to find them in the store.
http://www.imaginethatdigistamp.com/store/p217/Tooty_Fruity_-_Digi_Papers.html
http://www.imaginethatdigistamp.com/store/p205/Satin_Fabrics_-_Digi_Papers.html

Digital Embellishments:
  • I have used basic shapes in Photoshop Elements to create matting in behind the image and the sentiment. 
  • I have applied shadow layer styles to give certain elements some depth. These styles were designed by Sheila Reid, Pixel Scrapper.

Challenges I am hoping to enter..


You have until March 2nd to enter our challenge which should give you lots of time to get a creation done. Remember the theme is Lots of RED. I really hope that you will be able to join us. You can enter twice per challenge and of course MUST follow all the challenge requirements that are posted for each challenge (please click HERE to become familiar with all the rules). In addition to all the typical criterion, you MUST USE A DIGITAL OR STAMPED IMAGE to qualify for the drawing (unless stated otherwise). We would absolutely love to see you use a Pattie's Creations (PC) image on your card, but you are allowed to use other images. If you do use a PC image, you will gain an extra entry in the draw and will have a better chance to WIN!  Easy Peasy right!

Pop over to the challenge blog and check out what my fabulous teammates have offered up for inspiration. Oh and don't forget...Pattie offers up a new freebie the first Friday of the month and it will remain up for approximately two weeks; so, be sure to pop over and check it out as well!

Until next time,

Friday, February 15, 2013

Card Design: Scribbles Designs Challenge #2--Shades of Red

It is time for the next challenge over at the Scribbles Designs Challenge Blog.

This month we are looking for projects with Shades of Red.  So show us your designs covering the spectrum of the colour red.   
 Red is the color of fire and blood and it is associated with energy, war, danger, strength, power, determination as well as passion, desire, and love.  Light red is known to represent joy, sexuality, passion, sensitivity, and love.   Pink signifies romance, love, and friendship. It denotes feminine qualities and passiveness.  Dark red is connected with vigor, willpower, rage, anger, leadership, courage, longing, malice, and wrath.  Reddish-brown is associated with harvest and fall (Author Unknown. (2002-2013). Color Meaning. Available: http://www.color-wheel-pro.com/color-meaning.html. Last accessed 13th February 2013.).
So what will you come up with and will your project have any significant meaning?  It doesn't have to have any particular association with the meaning of the colour, I just thought it might be interesting to share with all of you what the different shades of the colour mean.

Don't forget that in order to qualify you MUST use a Scribbles Designs image, following the theme of the challenge. You can enter as many times as you'd like and you are welcome to combine your entry with other challenges.  However, we ask that you enter new projects/cards only - no back linking.  This challenge will end at 9pm PST on March 14th.

The winner, chosen by Random.org will receive 3 digital images.  Additionally, there will be 1 digital image handed out for each of the Top 3, chosen by the Scribbles Designs Design Team.  We look forward to seeing your interpretation of this month's theme. 

You can purchase your Scribbles Designs images HERE.
You can also find some free sentiments from Sandy's personal blog HERE.
 

To help inspire you, here is a card I created using one of Sandy's great free images that was available during the last four weeks on the challenge blog.  The sentiment I used on the inside is available at the store HERE.
 
Here is the front of the card... 

 Here is the inside...


 With a closer look at the right hand side...

  
Here are the card details, I hope I haven't forgotten anything...

General Notes:
 
  • As it turns out, the colour meanings seem to have little bearing on the project I created.  It is a bit of a stretch, but I did use reddish-brown and since it is associated with harvest and I have flowers, maybe there is a connection there?  I did say it was a stretch!
  • This is a long overdue card to say thank you to one of my husband's colleagues and her husband for a Christmas present they gave us.  I did say long overdue!
Digital Image:
  • Flower Pot:  The image on the front of the card is Sandy's flower pot image and is currently available HERE as a freebie.  I love the versatility of this image as it can be used on a wide range of projects.  It was mostly coloured using Copic markers.  Flowers:  R11, R14, R17, R20, R22, R24, R29 (petals); YG61, YG63, YG67 (leaves & stems).  Flowerpot:  E31, E33, E37.  Dirt:  E37, E39.  GroundingB00 (around plant and pot); grey and black watercolour pencils (ground).
Digital Sentiment:
  • Thanks a Bunch:  The sentiment I used on the inside is available at the store HERE.  I really like how this sentiment also has a floral image attached to it.  It really helped to bring the whole card together.  It was coloured using Copic markers: R20, R22, R24.
Paper Products:
  • Card base: Michael's Recollection's Cardstock, cream coloured.
  • Designer Papers:  Floral paper (front & inside)--K & C Company Designer Paper--Warm colours collection.  Brown & cream dotted (front)-- Recollection's Mosaic Memories Paper Pad.  Dark red (shadow & inside)--Michael's open stock scrapbook paper.  
Ribbon:
  • Crafts brand 30 mm ribbon that I've folded over partially--from Dollarama.
Embellishments:
  •  Red brads--from Dollarama.
 Challenges I hope to enter include:

So find that stash of red paper and haul out all your red markers.  Remember you have an entire month to enter at the Scribbles Designs Challenge Blog.  While you are there, please check out the great inspiration offered up from my colleagues on the DT.  We look forward to seeing your interpretation of our theme!   
Thank you so much for stopping by.  As I've now added to my comment section, whether you are a regular, here for the first time or popping over in your official capacity as a DT member, please know how much I appreciate the words that you leave behind.  Your encouragement helps me to become a better designer.   I try my best to reply to your comments (when an email address is available) but that is getting more and more difficult as my plate fills up with new responsibilities, new roles, and new obligations.  If I don't get the opportunity to thank you personally, know that I don't take a single comment for granted. Thank you for your understanding.

Until next time,

  
Note: I apologize if there are any formatting issues.  This is a scheduled post and we all know Blogger has a mind of it's own.  If it turns out that something looks wonky, i.e.--part of the sentence a different size than the rest, I'll fix it as soon as I'm able to.


Wednesday, February 13, 2013

Nail Design: Have A Heart

I realize it has been awhile since I posted a nail design but there is a good reason.

Just when I thought it was time to create a new design to honour the season of love, I lost the same comrade as the last time in a housekeeping accident.  I knew I hated housework for a reason.  While she wasn't lopped off at the head like she was previously, she has suffered a moderate concussion.  Once the comrades fall, it's like they all become that much more accident prone.  If you'd like a reference to what the heck I'm talking about, please refer to the post, "A Comrade Has Fallen" (click HERE to go to it--but please come back).  I can't believe it has taken almost three months for my 'comrades' to grow back to design length and then I lose one again.  Ah, the nail tragedy continues...

So, for now I'll post a design from my gallery over at Cool Nails Art that I created last year almost a year to the day.


 And for a closer look at the design...


This design is based on a 'You Tube' design that I can't seem to locate to give proper credit.  
  • Apply a base coat to protect the nails.
  • Add a red base. Apply minimum two coats for solid coverage.
  • Create a white French tip. 
  • Add a white heart on the red just below the white tip. 
  • Add white dots down the outer side of the nail and red dots across the top.
  • Finish off with a good top coat to protect your design.
There you go, a nice simple design to celebrate the season of love.

Until next time,


Monday, December 10, 2012

Holiday Handout: Day 1

We are soooooo close to Christmas, I can almost hear the sound of reindeer hoofs on the rooftop and smell the wonderful fragrances of Christmas time.  It may still be 15 days away but those days are going to fly by much too fast for my liking.  So today I present you with a holiday handout.  I don't know exactly how many there will be so come back often to find new goodies posted as we lead up to that magical day.

Today's goody should come out roughly 3.5 in. by 3.5 in. if brought up in Photoshop or in Microsoft Publisher.  For some reason in Inkscape (the program I use to create my digital designs until I learn how to use Photoshop Essentials) it comes out as being almost 12 in. by 12 in.  Actually, when I import it into the blog and choose original size it also shows up super huge.  I honestly don't understand why the pixels of the image enlarge so much when I save it as 300 dpi.  The original design stays small but the exported png breeds exponentially.   However, that is what happens when you don't have a background in digital design and fly by the seat of your pants hoping that what you create will turn out all right somehow by the grace of God and a little luck thrown in.  Sorry, bit of a run-on sentence going on there.  Just out of curiosity, when you import the images that you download from this blog into the programs you use, are they super big too?  If anyone knows of some great sites where they have easy to understand tutorials for Photoshop Elements, I'd love to know.  Just drop me a comment or an email.  I'd be ever so thankful.

So, now for your goody:

Hope someone out there can put it to use.

The Christmas countdown continues...

Until next time,
 

Sunday, December 09, 2012

Nail Design: Christmas Colours

While my nails continue their pilgrimage to sufficient design length (if you are interested in the back story click HERE), I present you with another design from last year.  It is currently posted on my personal page at the Cool Nails Art website.


Instructions:
  • Start with a clear base coat to protect the nails. 
  • Paint entire nail with red.
  • Next paint about 1/3 of the nail with a green appropriate for the season.
  • Add a stripe with a glittery gold polish painted on where the red and green meet.
  • Finish with 2 coats of a good quality top coat and you have some pretty fingers all dressed up for the Christmas season.
Another pretty simple design!

Now a special surprise freebie that you will only find by actually reading this post because I'm not putting it into the labels or search parameter nor telling anyone where to find it.  It is just for those of you who took the time to read through this post.  Call it an early Christmas gift.


This paper is produced at 300 dpi and is much larger than what appears here.  Enjoy and let the countdown to Christmas begin.  Keep checking back for more goodies this week. 

Until next time,